


Safe Ice NSF Certified Ice Machine Cleaner and Descaler – Ready to Use Nickel Safe Ice Maker Cleaner, Food Grade Formula, Compatible with All Ice Makers, Made in USA, 32 fl oz (8 Uses)
Safe Ice NSF Certified Ice Machine Cleaner and Descaler – Ready to Use Nickel Safe Ice Maker Cleaner, Food Grade Formula, Compatible with All Ice Makers, Made in USA, 32 fl oz (8 Uses)
"Works exactly as described — my ice maker looks brand new."
Jennifer M. · Verified BuyerCouldn't load pickup availability

Safe Ice NSF Certified Ice Machine Cleaner and Descaler – Ready to Use Nickel Safe Ice Maker Cleaner, Food Grade Formula, Compatible with All Ice Makers, Made in USA, 32 fl oz (8 Uses)
Ingredients
Ingredients
Deionized Water, Sodium Bisulfate (food grade), citric acid (food grade)
Description
Description
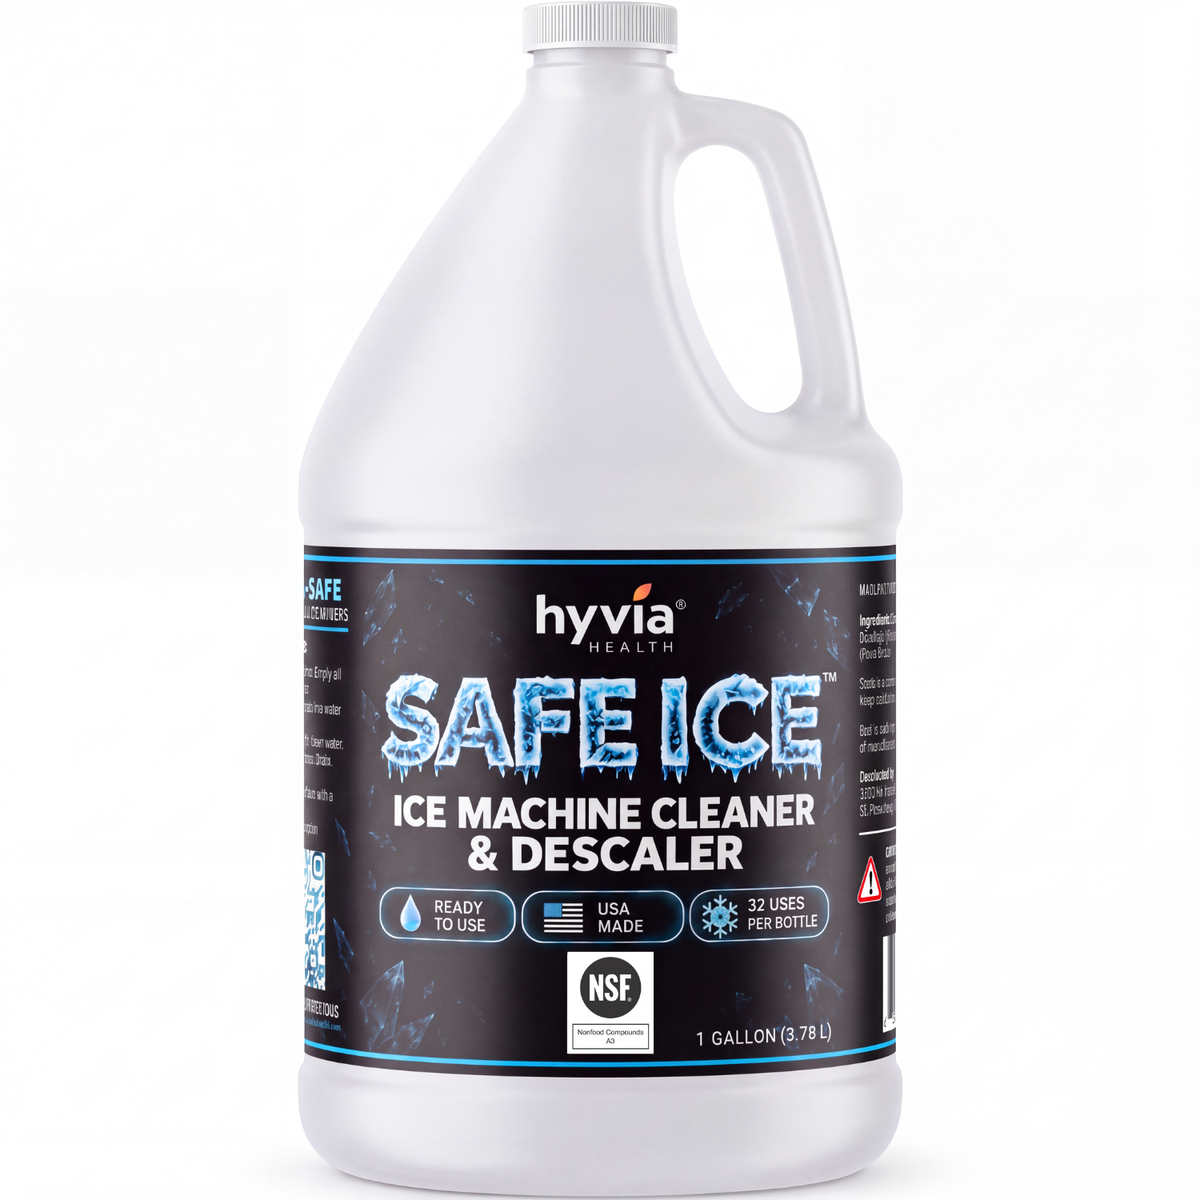
- NSF CERTIFIED ICE MACHINE CLEANER & DESCALER – Your ice touches your drinks, so what you clean with matters. Safe Ice is NSF Certified, independently evaluated for use on food contact equipment — the only ice maker cleaning solution in its class with this credential. Safe for commercial kitchens, safe for your home.
- READY TO USE ICE MAKER CLEANER — NO MIXING, NO GUESSWORK – No diluting, no measuring cups, no math. Just pour 4 oz of this ready-to-use ice machine cleaner and descaler straight into your water reservoir, fill with water, and run the cycle. Step-by-step directions are printed right on the label.
- NICKEL SAFE & COMPATIBLE WITH ALL ICE MAKERS – Our nickel safe ice machine cleaner is gentle on evaporators and internal components. Works with countertop, portable, nugget, undercounter, built-in, and commercial ice makers — every make and model. A true descaler for ice machine of any type.
- FOOD GRADE INGREDIENTS — NOTHING HIDDEN – Made with just three ingredients: deionized water, food grade sodium bisulfate, and food grade citric acid. This fresh ice machine cleaner dissolves limescale, mineral buildup, and deposits for clearer cubes and fresher-tasting ice. Made in the USA.
- 8 CLEANINGS PER BOTTLE – Each 32 fl oz bottle delivers 8 full cleanings at 4 oz each — that's a full year of maintenance at the recommended monthly schedule. Scan the QR code on the label for full directions. Questions? Our USA-based team is here to help.
Technical
Technical
- Active Ingredients - Food-Grade Sodium Bisulfate, Food-Grade Citric Acid, Deionized Water
- Form - Ready-to-use liquid (no mixing or diluting required)
- Sizes Available - 32 fl oz (8 uses per bottle), 1 gallon (32 uses per bottle)
- Usage Per Cleaning - 4 fl oz per cycle
- Nickel Safe - Yes
- NSF Certified - Yes (Nonfood Compounds, Class A3)
- Compatible With - Countertop, portable, nugget, undercounter, built-in, commercial, and refrigerator ice makers
- Removes - Mineral scale, lime deposits, and waterline buildup
- Scent - Unscented
- Country of Origin - USA
Shipping
Shipping
Standard shipping takes 5-7 days to arrive. We only ship within the USA.
Return Policy
Return Policy
We don't accept returns, but we do make it right. If your order arrives damaged, defective, or isn't what you expected, email us at Info@hyviahealth.com within 30 days of delivery and we'll send a replacement or issue a full refund — your choice. No need to ship anything back.

How It Works
Clean Ice in 4 Simple Steps
Drain & Remove
Power off, drain the reservoir, and remove the ice bin and any removable parts.
Add Safe Ice™
Pour 4 fl oz of Safe Ice™ into the water reservoir, then fill to the max line with water.
Run Clean Cycle
Press the clean button and let the machine work. Takes about 30 minutes — no scrubbing needed.
Rinse & Enjoy
Run 2 fresh-water rinse cycles, discard the first batch of ice, and you're done.
How to Clean Your Ice Machine
Detailed step-by-step instructions for descaling, rinsing, and maintaining every type of ice maker — countertop, nugget, undercounter, and commercial.
When to Clean Your Ice Machine
For most households, cleaning every 1–3 months is the right cadence. Hard water areas (above 12 grains per gallon) may need monthly cleaning. Commercial machines should be cleaned at least monthly per NSF guidelines. That said, your machine will tell you when it needs attention — here's what to watch for:
Slow Ice Production
Taking longer than usual to produce a batch? Mineral buildup is restricting water flow through the evaporator.
Cloudy or Murky Ice
Clear ice requires clean water pathways. White or opaque cubes signal mineral deposits in the water lines.
Off Taste or Smell
A metallic, chalky, or musty taste in your ice is a sign of scale buildup or biofilm inside the machine.
Visible White Deposits
White or grey scale on the reservoir walls, auger, sensors, or evaporator plate means descaling is overdue.
Clean Indicator Light
Many machines have a built-in "Clean" or "Self-Clean" light. When it's on — clean it.
Grinding or Unusual Noises
Scale on rotating parts like the auger causes grinding. Don't ignore it — it can cause premature motor wear.
What You'll Need
Clean Removable Parts First
Before running any cleaning cycle, remove and hand-wash all detachable components. This prevents loose buildup from getting circulated through internal lines.
-
1
Power off and unplug
Turn the machine off and unplug it from the wall outlet. If it's plumbed directly to a water line, shut off the supply valve. Never clean a running machine.
-
2
Remove all ice and drain the water
Remove ice from the bin and discard it. Drain the water reservoir completely — residual water dilutes the cleaner and reduces its effectiveness. Use a towel to absorb any remaining water at the bottom.
-
3
Remove the ice bin, scoop, and any removable trays
These parts accumulate invisible biofilm and lime deposits even when they look clean. Take them out and set them aside for hand washing.
-
4
Wash removable parts by hand
Use warm water and a soft cloth or soft-bristle brush. Scrub all surfaces thoroughly, paying close attention to corners and channels where slime and biofilm can hide. Rinse under running water until the water runs clear.
Note: Do not put plastic ice bin parts in the dishwasher unless your manufacturer's manual specifically permits it — high dishwasher temperatures can warp plastic components. -
5
Set parts aside to air dry
Place washed parts upside-down on a clean dry towel. Do not reassemble until everything is completely dry — moisture trapped in a closed bin encourages mold growth.
Descaling the Machine (The Main Event)
Descaling dissolves and flushes mineral scale, lime deposits, and buildup from water lines, the evaporator, and ice-forming components. This is what Safe Ice™ is specifically formulated for.
-
1
Measure 4 fl oz of Safe Ice™
Pour exactly 4 fl oz (½ cup) of Safe Ice™ directly into the empty water reservoir. Do not pre-dilute — Safe Ice™ is a ready-to-use formula. No mixing required.
For heavy buildup: If you're cleaning for the first time or haven't cleaned in 6+ months, you can run two consecutive cleaning cycles back-to-back before rinsing for a more thorough descale. -
2
Fill reservoir to the max line with clean water
Add clean, fresh water to the reservoir up to the maximum fill line. This dilutes the concentrate to the proper working strength and ensures the solution reaches all internal components during the cycle.
-
3
Run the cleaning cycle
Plug the machine back in and press the "Clean," "Wash," or "Self-Clean" button. Refer to your machine's manual for the exact button or sequence. The cleaning cycle typically takes 20–45 minutes depending on the model.
No dedicated clean cycle? If your machine doesn't have a clean mode, simply run a normal ice-making cycle. The solution will still circulate through the internal water pathways. You may need to repeat once for thorough coverage. -
4
Manually scrub accessible interior surfaces
While the machine is cleaning or immediately after, use your soft-bristle brush to scrub any surfaces you can reach: the ice chute, water sensors, reservoir walls, and any visible scale deposits on the evaporator plate or auger. The cleaning solution softens scale buildup — this is the best time to break it loose.
Focus areas: Water inlet nozzle, ice chute opening, evaporator plate (the metal surface ice forms on), water distribution tubes, and any crevices where white mineral deposits are visible. -
5
Drain the cleaning solution completely
Once the cycle finishes, drain the reservoir completely. Remove the drain plug if your machine has one. Tilt the unit slightly if needed to ensure all solution drains out. Wipe the reservoir dry with a clean cloth before rinsing.
Rinsing — Don't Rush This Step
Inadequate rinsing is the most common mistake when cleaning an ice machine. Residual cleaning solution left in the lines can affect ice taste. Run a minimum of two full rinse cycles — three is better.
-
1
First rinse cycle
Fill the reservoir to the max line with fresh, clean water. Run a full normal ice-making cycle (or press "Clean" again if available). This flushes the bulk of the cleaning solution from the internal lines. Drain completely when done.
-
2
Second rinse cycle
Repeat with a fresh fill of clean water. Run the full cycle again. Drain completely when done. This second pass clears any remaining traces of the descaler from internal components.
If the drained water still smells faintly of citrus or chemicals after the second rinse, run a third cycle. The water should smell neutral before you proceed. -
3
Reassemble and make a test batch — then discard it
Replace the clean, dry ice bin and scoop. Plug in the machine and run a normal ice-making cycle. Discard the first 1–2 full batches of ice produced. This ensures any last trace of solution is purged before ice enters your drinks.
Quick check: Taste a cube from the second or third batch. It should taste clean and neutral with no chemical or citrus aftertaste. If you detect anything, run one more rinse cycle.
Exterior, Vents & Final Wipe-Down
-
1
Wipe down the exterior
Use a soft, damp cloth to wipe down the outside of the machine. For stainless steel surfaces, wipe in the direction of the grain to avoid streaks. Dry immediately with a clean towel.
Avoid ammonia-based or bleach-based sprays on stainless steel — they can discolor the finish over time. A diluted white vinegar solution on a cloth works well for exterior fingerprints and water spots. -
2
Clear the rear vents and condenser
Use a dry cloth, soft brush, or vacuum attachment to remove dust and debris from the rear ventilation grilles and condenser coils. Blocked vents force the compressor to work harder, which shortens machine life and leads to slow ice production.
-
3
Check and replace the water filter (if equipped)
Many ice machines have an inline or internal water filter. Cleaning sessions are a good time to check whether the filter needs replacing. Most manufacturers recommend replacing every 3–6 months. A clogged filter will slow ice production and defeat the purpose of descaling.
Ongoing Maintenance Tips
Use Filtered Water
Using filtered or distilled water significantly reduces mineral buildup — it can extend cleaning intervals by 50% or more in hard water areas. It also produces clearer, better-tasting ice.
Set a Cleaning Schedule
Mark your calendar monthly or set a recurring phone reminder. Consistent cleaning at regular intervals is far easier than clearing heavy scale buildup that's been accumulating for a year.
Store the Bin Inverted
When the machine won't be used for several days, remove the ice bin, wash it, and store it upside-down at room temperature. This prevents condensation from pooling and creating a mold-friendly environment.
Keep Vents Clear
Leave at least 4–6 inches of clearance around the rear and sides of the machine for ventilation. Heat buildup from a blocked compressor slows ice production and causes mechanical wear over time.
Replace the Water Filter Regularly
A dirty filter undoes the benefit of descaling — it adds contaminants right back into the water. Check the filter every time you clean and replace it on the manufacturer's recommended schedule (typically every 3–6 months).
Don't Ignore Noises
Grinding, squealing, or rattling sounds are often caused by scale buildup on the auger or evaporator. Cleaning earlier when you hear these sounds can prevent irreversible component damage.